polls
You no longer need to have members vote at a specific location, guard the ballot box, and manually tally and record votes. Our secure polls functionality does all that for you, and you get many more options (way more than social media) to professionally customize polls for your chapter.
Watch our video tutorial or view the detailed steps below to get started.
Watch our video tutorial or view the detailed steps below to get started.
How to create a poll
Chapter admins can create a poll in minutes, and it’s a powerful tool to facilitate secure, online voting for officer elections, awards, or anything else for your organization. Admins have the flexibility to customize who is qualified to take the poll, start and end times to access the poll, the data displayed in the results, and more. They can choose to make submissions anonymous or require users to submit their names. Polls can also be created with more than one question – there’s no limit. Get started by following the steps below.
Chapter admins can create a poll in minutes, and it’s a powerful tool to facilitate secure, online voting for officer elections, awards, or anything else for your organization. Admins have the flexibility to customize who is qualified to take the poll, start and end times to access the poll, the data displayed in the results, and more. They can choose to make submissions anonymous or require users to submit their names. Polls can also be created with more than one question – there’s no limit. Get started by following the steps below.
- In the left navigation sidebar, click Polls
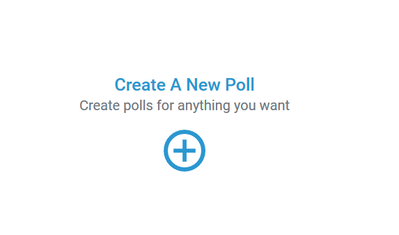
- Click on Create a New Poll
3. Create a title for your poll, and answer the questions about what type of poll you’re creating:
Note: Private polls can only be viewed by invitation. Those who are not on the participant list will not be able to view the poll, even if someone attempts to share the URL.
- Decide if your poll is public or by invite only
Note: Private polls can only be viewed by invitation. Those who are not on the participant list will not be able to view the poll, even if someone attempts to share the URL.
- You can select a poll start and end date and time
- Determine visibility settings for your poll results

4. Add any specific messages or instructions for the following:
- Intro: You can provide information about the poll before members take it
- Thank You: Include a customized thank-you message when members complete the poll
- Closed Poll: Provide a specific message for members attempting to take the poll after it has closed
- Footer: Include any messaging that will appear at the bottom of the poll
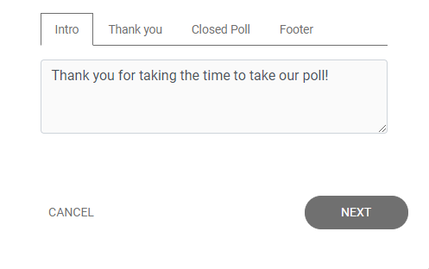
5. Click Next to continue
6. Enter your poll question
7. Select the question type from the dropdown menu:
6. Enter your poll question
7. Select the question type from the dropdown menu:
- Textbox: A field will be provided for members to type in their answer.
- Dropdown menu: You’ll provide the answer choices, which will appear in a list for members to make only one selection. Members will need to click the dropdown to display the options, then make a selection.
- Checkbox: You’ll provide the answer choices, and members will be able to select more than one option.
- Radio button: You’ll provide the answer choices, and members will be able to select only one.
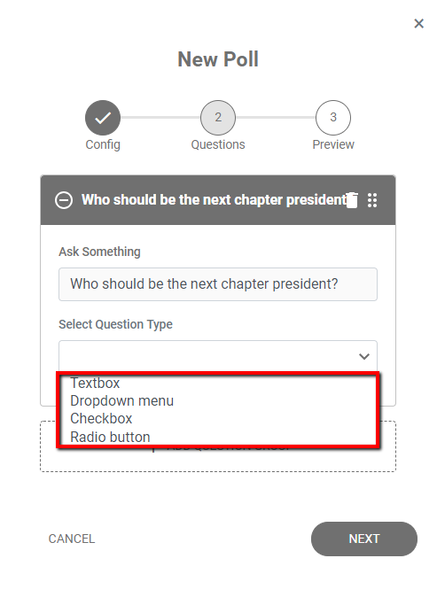
8. Create the poll answers for the type of question you’ve chosen
Note: You can create as many questions for your poll as needed. There is no limit.
9. Click Next when you’ve completed adding questions/answers
10. Preview your poll and select either Save Draft or Publish when ready
- If your poll includes multiple questions, click Add Question Group, then repeat steps 6-8.
Note: You can create as many questions for your poll as needed. There is no limit.
9. Click Next when you’ve completed adding questions/answers
10. Preview your poll and select either Save Draft or Publish when ready
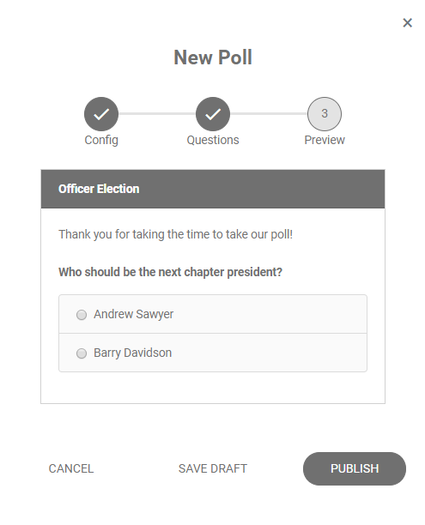
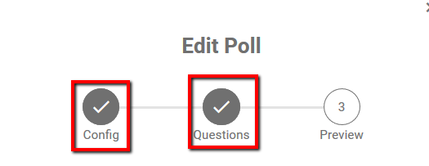
- If you need to go back and make edits, you can click Config or Questions to navigate to those sections.
Note: The preview is only a sample view for you to see all the questions and answers on one screen. The actual published poll will only show one question group per screen. If your poll has more than one question, members will be required to select or type in an answer and click the Next button to view the following question groups.
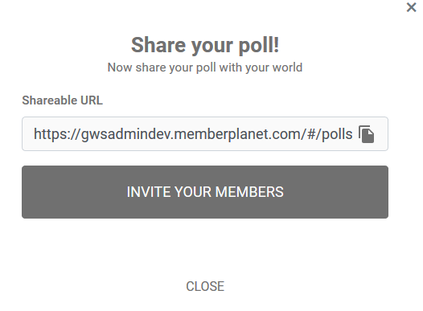
11. Once published, you can share it via the provided URL or invite members to view
11. Once published, you can share it via the provided URL or invite members to view
How to edit, delete, or close a poll
This is how you can edit poll details, delete a poll, or manually close a poll to respondents.
Note: If you delete a poll you will also delete any data associated with it.
This is how you can edit poll details, delete a poll, or manually close a poll to respondents.
- In the left navigation sidebar, click Polls
- Locate the poll you wish to edit in your dashboard and click on it
- Click the corresponding button to Delete or Close your poll
Note: If you delete a poll you will also delete any data associated with it.
- You can reopen a closed poll by clicking Edit on the poll and reconfiguring its end time

To edit a poll:
To pause a poll:
Pausing a poll is similar to unpublishing a live poll, but it allows you to resume it without having to adjust any of the poll's configurations.
To resume a paused poll:
- Click on the poll you want to edit
- Select Edit from the menu bar
- Make any desired changes to the poll configuration, questions, or customizable messages
- Click Save Draft or Publish to save your changes
To pause a poll:
Pausing a poll is similar to unpublishing a live poll, but it allows you to resume it without having to adjust any of the poll's configurations.
- In your polls dashboard, click on the title of the poll you want to pause
- In the top menu bar, click the Pause button
To resume a paused poll:
- In your polls dashboard, click on the title of the poll you want to pause
- Click on the paused poll
- Select Edit from the menu bar
- Navigate to the third step, Preview
- Click Publish
How to view and export poll results
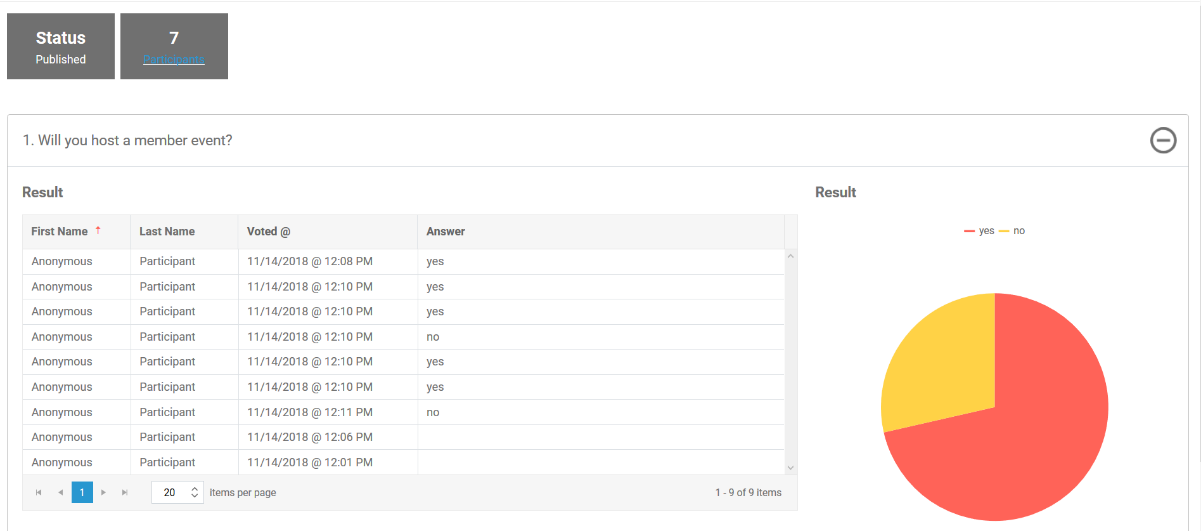
Admins can view poll results in real time without the hassle of waiting for tabulation. The data is presented both as a list of individual responses and as a pie chart for better graphical interpretation of the data. Results can easily be exported as an Excel spreadsheet.
Admins can view poll results in real time without the hassle of waiting for tabulation. The data is presented both as a list of individual responses and as a pie chart for better graphical interpretation of the data. Results can easily be exported as an Excel spreadsheet.
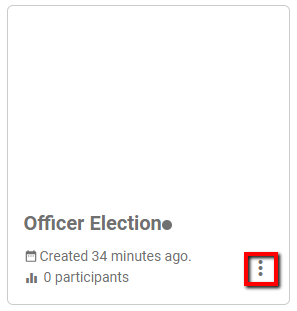
- In the left navigation sidebar, click Polls
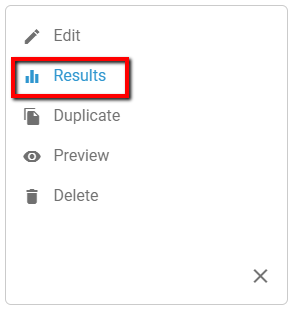
- Click on the more icon (three dots) for the poll you want to view results for

3. Click on Results
4. Click on any of the question groups displayed or the + symbol to view the poll results for each question

5. Depending on the configuration to create a poll, your results will show:
- The names of voters unless you set responses to anonymous
- The dates and time they voted
- The answers submitted
- Which participant or number of participants who haven’t yet voted
- Your results will also appear as a pie chart for easier breakdown
To export poll results:
- Click on the more icon (three dots) for the poll you want to view results for
2. Click on Results

3. Select Export
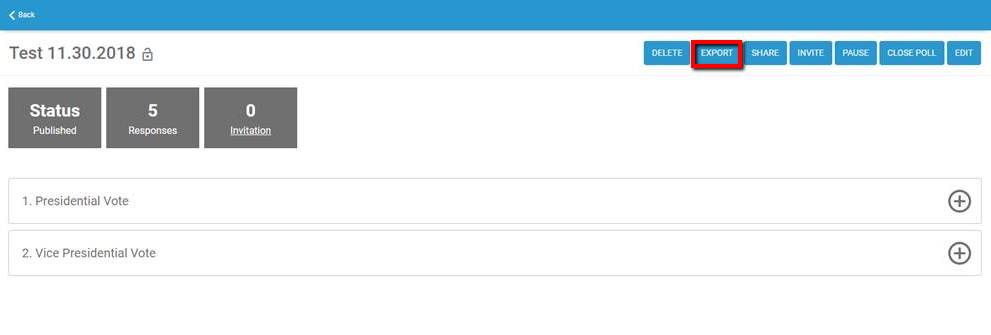
- The file will be downloaded to your computer.
Support |
|


© 2020 memberplanet, LLC. ALL RIGHTS RESERVED.